Hello everyone!!!!
Well I’m finally posting again after about a month. My computer had a virus and was out of commission for awhile, plus life has thrown me a major curve ball and I am just trying to get through each day. Ugh!!! But….I did manage to get two Christmas layouts done with the awesome Keep Christmas kit from Things That Shine. This amazing kit has everything you need to create a Christmas mini or some festive layouts like I did! Here is my first layout titled The Best Gift:

My son (now age 12) penciled word “tree” for me to finish off my poem.
Details:

The greenery and Merry Merry are cuts from Things That Shine! They come white and I just inked them up with some JBS seed packet ink. I also layered the 6×6 papers patterned papers that come in the Keep Christmas kit behind the photos. The bottom paper is actually vintage wrapping paper. I love the graphic style and uniqueness of it!!

I layered items from the kit to create this one of kind embellishment to mark the date of these Christmas morning photos.
And now for layout #2 titled My Little Guy:

Another sampling of all the wonderful goodies from the Keep Christmas kit.
Details:

This Santa wood veneer is one of the many that come in the kit. I dipped a brush in water then rubbed it over the same seed packet green ink pad and applied it to the wood veneer, which tops the layers of sparkle, twine, ribbon, and pre-sewn crate paper from the kit. Love it!!!!!!

I used the wood veneer snow flakes as a stencil on the right side of the kraft paper, by spraying gold Color Shine mist over them. Then I used three of the sprayed snow flakes on the layout. I attached this tag from the kit with the included twine to use as part of my title. I love this red dotted vellum from the kit I tucked behind more kit patterned paper and the photo.
I hope you enjoyed these layouts using photos from Christmas past. It doesn’t have to Christmas to scrap Christmas, especially with Ashley’s amazing Keep Christmas kit from Things That Shine.
See ya all soon!!!!
xox, Evie


 For the background I layered and stitched down two different vellum dotted papers from MME over a sheet of patterned paper from Crate Paper’s Boys Rule collection. Then I began adding bits and bobs from
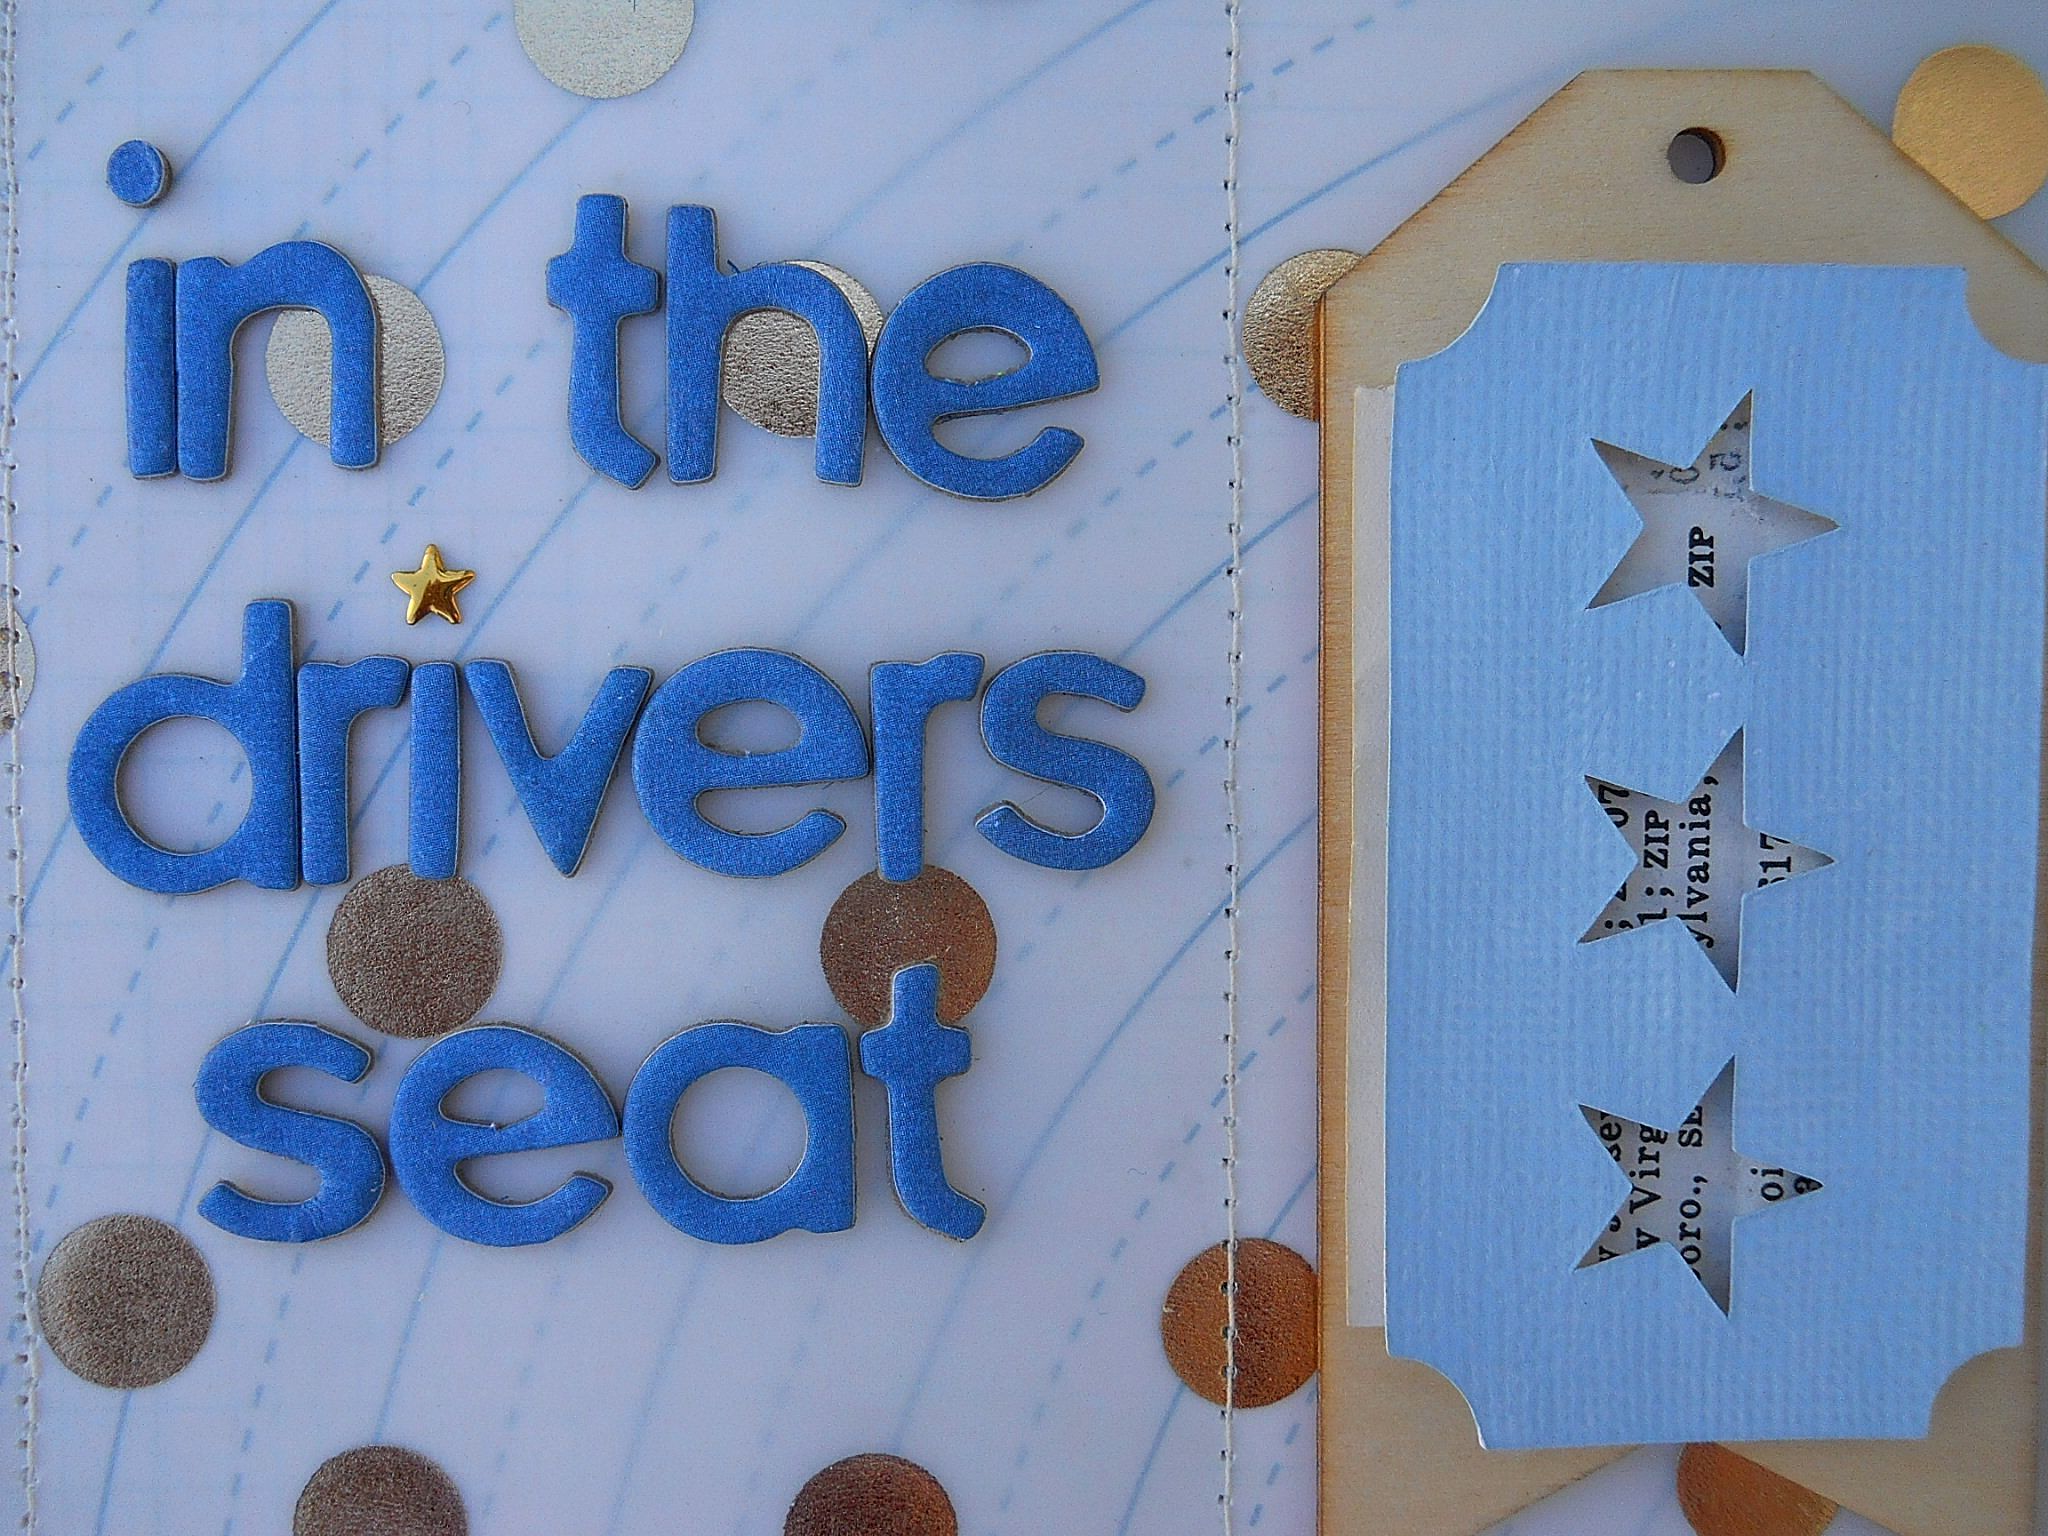


